RECIPE

Air Fryer Eggplant Parmesan

Have you heard of the “technology adoption curve” or “innovation adoption lifecycle”? It describes how quickly different proportions of a population accept new technologies and practices. It looks something like this:

That’s right. I’m usually so far behind the rest of the population that I can pick up the “new” technology at thrift stores for a fraction of the price once everyone else has moved on to the next new thing. How far behind am I? My tractor is turning 72 years old next month. My car is older than I am. I’m still using my 12-year-old printer (it was free!) And, fourteen years after its introduction, I finally bought an air fryer.

I was pretty hesitant to buy one for several reasons. Did I really need another cooking gadget? Surely my ancient toaster over (an excellent thrift store score) would suffice? If I bought an air fryer, would I immediately slide down the slippery slope of buying junk food like frozen onion rings, mini corn dogs, and mozzarella sticks?

Even accidentally winning a trivia contest about air fryer cooking two years ago didn’t convince me to purchase one. So thank you to the CSA members who finally convinced me to go for it!

My very first experiment in the air fryer: eggplant parmesan. Delicious! (Plus, convenient to use up the last of the eggplants and tomatoes of the season).

Subsequent experiments indicate I still have some work to do to perfect sweet potatoes, salmon, and egg bites. Grilled cheese was amazing, though! Up next: experimental air fryer aloo gobi (an Indian cauliflower dish).

Eggplant Parmesan Recipe

Ingredients

  • 1 large or 2 small eggplants

  • 1/2 cup flour

  • 2 eggs

  • splash of milk

  • 1 cup bread crumbs

  • 1 teaspoon garlic powder

  • 1 teaspoon Italian seasoning

  • 1 cup marinara or tomato sauce

  • 1/2 cup shredded mozzarella cheese

  • Chopped basil or parsley for garnish (I used parsley and oregano)

directions

Slice eggplants into 1/2” thick rounds, lightly salt both sides (optional), and let sit.

In a shallow bowl, combine bread crumbs, garlic powder, and Italian seasoning. In a separate bowl, whisk eggs and milk. Put flour in a third bowl. Preheat air fryer to 370-390 degrees, depending on settings available.

Pat eggplant slices dry with a paper towel. Dip each slice first in the bowl of flour, fully coating the slice. Then, dip in egg bowl. Finally, place in bowl of bread crumbs and ensure the slice is fully coated with bread crumbs.

Arrange slices in single layers (you’ll need multiple racks or to do several rounds of cooking) in the air fryer, and air fry for 6-8 minutes (check regularly to ensure they’re not too brown). Flip slices and air fry another 4-6 minutes.

While eggplant is cooking, warm the marinara sauce. Or, if like me you don’t have any, make your own tomato sauce by sautéing onions, garlic, diced tomatoes, and spices/herbs. Allow to simmer while eggplant is cooking.

When eggplant is done, spread a layer of tomato sauce on the bottom of the plate. Arrange eggplants on sauce. Immediately sprinkle with cheese so it melts and then top with herbs.

Eggplant Mini Pizzas

Don’t be afraid of cooking with eggplant! If you’ve never used it before, here’s a very simple recipe to try it out.


Ingredients:

  • 2 eggplants

  • 4 Tbsp olive oil

  • 1/2 cup pizza sauce or marinara

  • 1/2 cup shredded mozzarella cheese

  • small package of pepperoni

  • 3 leaves fresh basil

Directions:

Preheat oven to 400 degrees. Grease pan well or use parchment paper. Cut eggplants into 1/2” rounds. Brush both sides of each round with oil. Bake for 10-15 minutes until soft. Remove from oven, spread 1-2 Tbsp sauce on each round, then sprinkle with cheese and add toppings. Return to oven for 5 minutes or until cheese is melted. Garnish with freshly chopped herbs.

Substitutions:

  • I didn’t have marinara or pizza sauce, so I stirred some tomato paste into spaghetti sauce.

  • Try parmesan instead of mozarella cheese.

  • Use any toppings you like: mushrooms, bell peppers, sausage, etc.

  • Try this in an air fryer and let me know how it works!

Shrimp Lettuce Wraps

Last spring one of my friends was preparing for a surgery and was on a very restrictive diet. To liven things up, I offered to make supper with lots of fresh ingredients from the farm. It was a really fun challenge to prepare a 5-course meal that was under 1000 calories.

This is the first course in the Asian-themed, low-calorie, five-course meal: shrimp lettuce wraps as an appetizer.


ingredients

  • 2 Tbsp lime juice

  • 1 to 2 Tbsp gochujang (which is a Korean hot pepper paste), or your favorite hot sauce

  • 1 Tbsp oil (try sesame if you have it)

  • 2 tsp honey

  • 1 green garlic, grated (or 1 clove garlic)

  • 2 tsp grated fresh ginger

  • 1 lb small shrimp, peeled and deveined

  • 1 head romaine lettuce (or other head lettuce), leaves separated

  • 1 cucumber, cut in small cubes

  • several radishes, sliced (or substitute salad turnips)

  • several leaves fresh mint (or basil, or cilantro), cut in small ribbons

directions

Combine lime juice, gochujang, oil, honey, garlic, ginger, and shrimp in a bowl, stir, and let marinate in the fridge for an hour.

Preheat oven to 425. Arrange shrimp on a sheet pan and roast until just opaque throughout, about 10-15 minutes.

Allow shrimp to cool slightly, then lay out lettuce leaves and fill with shrimp, cucumbers, radishes, and mint.

Roasted Sweet Potato and Arugula Salad

The first boxes of the spring CSA season went out this past week! Here’s what they included: sweet potatoes (stored from last fall’s harvest), green garlic, arugula, leaf lettuce, french breakfast radishes, and chive blossoms.


One of the perks of CSA membership is the weekly CSA email. This email includes a list of each item in the CSA box that week along with storage and preparation tips. It also features one of the items in the box with a deep dive into its history, nutrition, and additional preparation suggestions. And, each week Farmer Katie selects or creates a recipe that utilizes some or all of the items in the box.

This week’s recipe utilizes all six of the items in the box, and it is delicious!


Roasted Sweet Potato and Arugula Salad

INGREDIENTS

Salad:

2 medium sweet potatoes, peeled and diced

1/2 red onion, thinly sliced (or substitute green garlic)

1 tablespoon oil

1/2 teaspoon chili powder

Pinch of cayenne pepper (optional)

Salt and pepper to taste

6 cups baby arugula (and/or other salad greens)

4 radishes, sliced very thinly

2 tablespoons toasted sesame seeds

2 tablespoons finely chopped fresh chives (or chive blossoms)

Honey-balsamic dressing:

2 tablespoons balsamic vinegar

1 tablespoon honey

1 teaspoon Dijon mustard

4 tablespoons olive or sesame oil

Salt and pepper to taste

DIRECTIONS

Preheat oven to 375°F. Toss the sweet potatoes and onion with the oil, chili powder, cayenne, salt, and pepper. Place on a baking sheet and roast for 20 minutes, stirring gently every 5 to 10 minutes. Increase the heat to 400°F and roast for another 5 to 10 minutes until the sweet potatoes are golden brown. Continue to stir the sweet potato pieces as needed to prevent over-browning. Remove from the oven when soft throughout and let cool slightly.

In the meantime, whisk together vinegar, honey, mustard, and olive oil. Season with salt and pepper and set aside.

In a medium bowl toss together arugula, sliced radishes, and chives. To serve, arrange arugula mixture on plates. Spoon sweet potatoes over arugula, sprinkle with toasted sesame seeds, drizzle with dressing, and serve. (Serves 4)

Recipe adapted from: The Iron You

Tim's Jalapeño Poppers

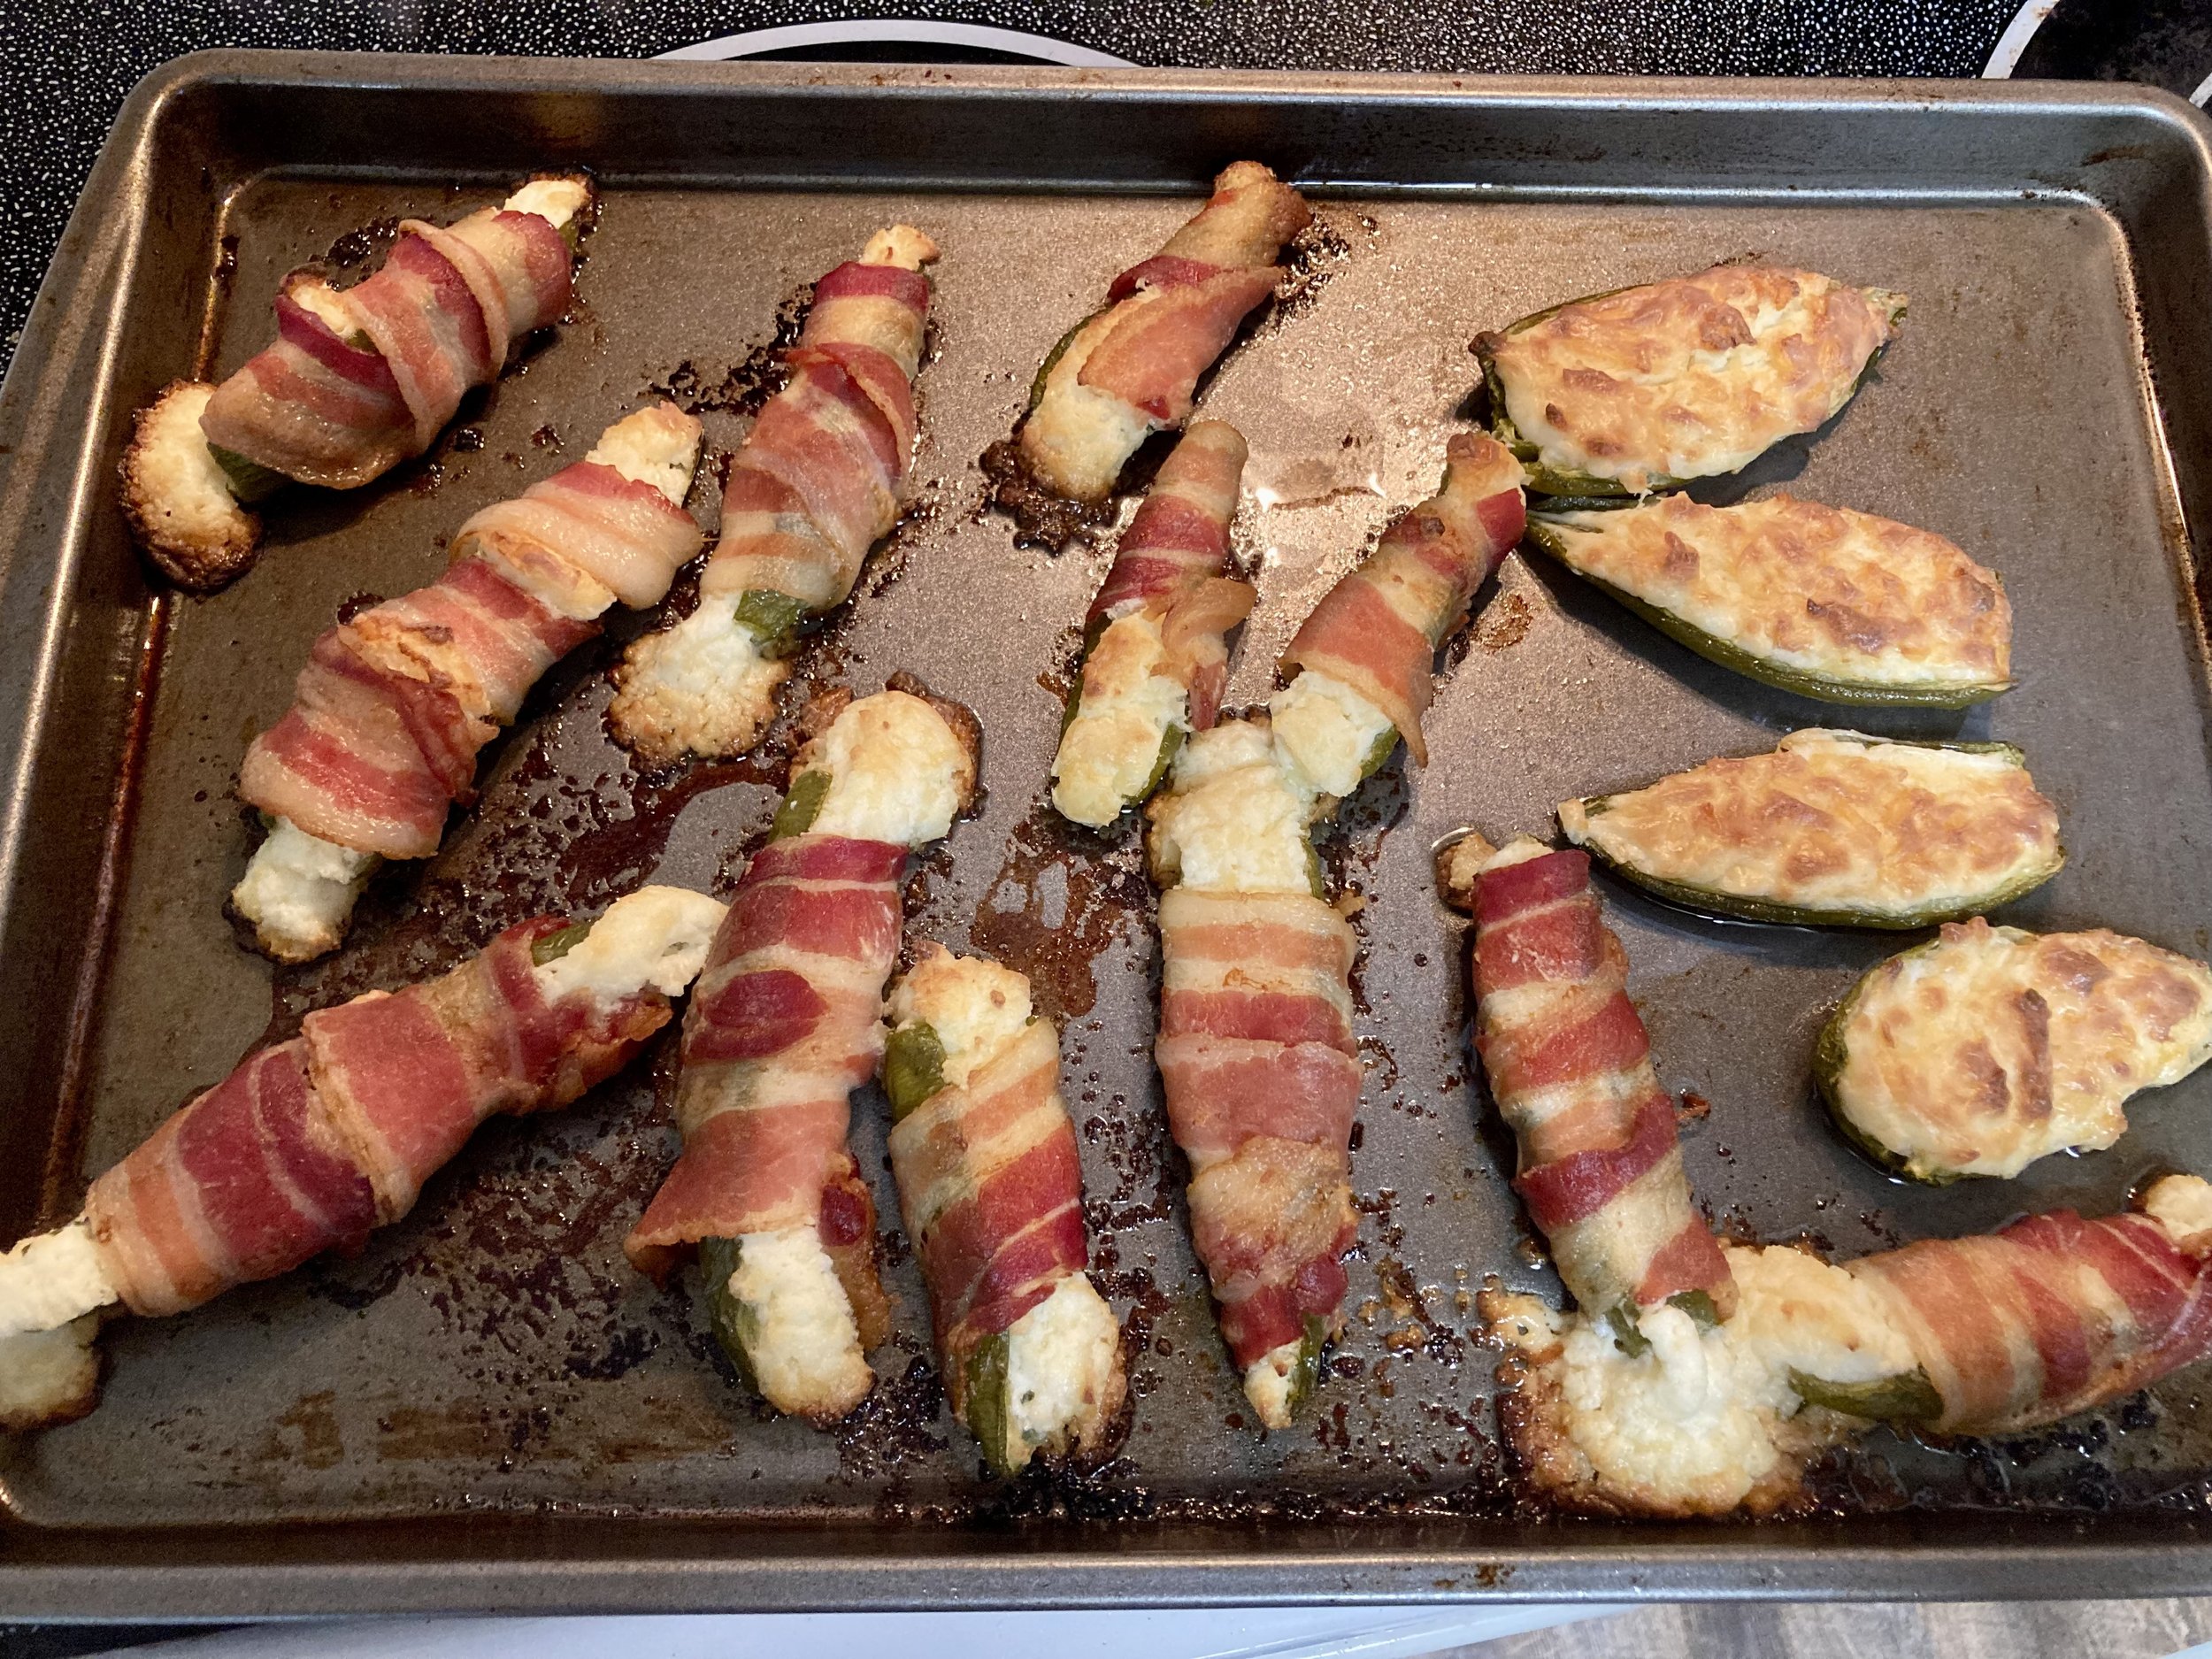
For part of the time I lived in Indiana, I stayed with a lovely couple who were both excellent and adventurous cooks. One of Tim’s many specialties was his bacon-wrapped, stuffed jalapeños. I’ve made these several times since for birthday meals or get-togethers with friends. These make great appetizers for football games or grilling parties.

Here’s my most recent batch, fresh out of the oven. (You can see I wrapped the bacon a little too tightly around the jalapeños and the cheese oozed out the ends. Oops. Still delicious!) If you’ve got some vegetarians around, just skip the bacon, like the ones on the far right. Or, if you don’t want to wrap the bacon around the jalapeños, you can precook the bacon and chop it into small pieces to mix into the cheese filling.

INGREDIENTS:

  • 10-12 jalapeños (or no-heat jalapenos)

  • 1 block of cream cheese

  • 1 small piece of a hard cheese, grated (I happened to find a container of pre-grated Asiago)

  • 1/2 package of bacon

DIRECTIONS:

Preheat oven to 400 degrees. Cut jalapeños in half the long way (wearing gloves!) and remove seeds and membranes. Put jalapeño halves and the equivalent number of bacon strips on a baking sheet in the oven to begin baking. Meanwhile, put cream cheese into microwave-safe bowl and microwave for a few seconds at a time until softened enough to stir. Stir in grated cheese, approximately 1/2 - 1 cup of grated cheese). Pull jalapeños out of the oven. Cool to touch, then use a spoon to fill each jalapeño half with cheese filling. Pull bacon out of the oven and cool to touch. Wrap a strip of bacon loosely around each jalapeño, with the end tucked underneath. Place wrapped jalapeños back on baking sheet and bake until bacon is crispy, about 30 minutes.

Other optional additions to the cheese filling: minced onions or garlic, chopped chives or garlic chives